Winning with your wormery
April 23, 2019

If you’ve been thinking about setting up your own wormery, why not take a leaf out of Master Composter, Helen Burgess’ book. Here, she shares her experiences to creating the perfect environment for worms, to help turn your unwanted kitchen peelings into super-rich, organic compost and liquid plant feed.
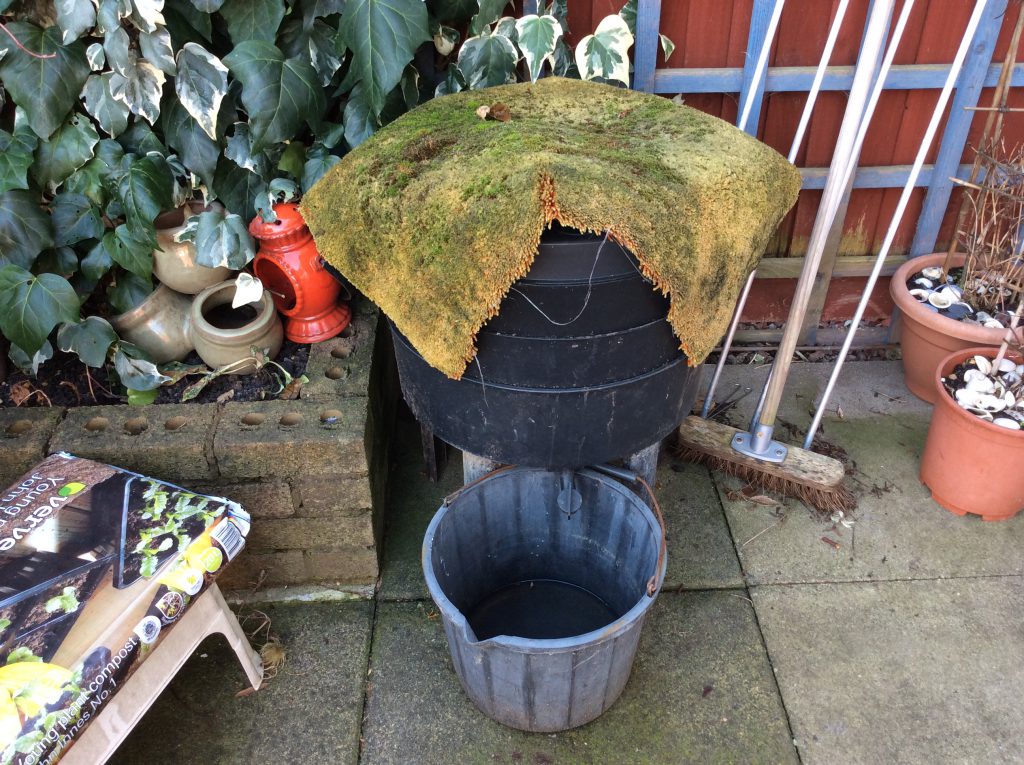
“Two years ago, I decided to start a wormery. I was lucky to obtain a second-hand stacking wormery in very good condition for £20. I sited it in a shady, sheltered spot quite close to my kitchen door for ease of feeding it with kitchen waste.
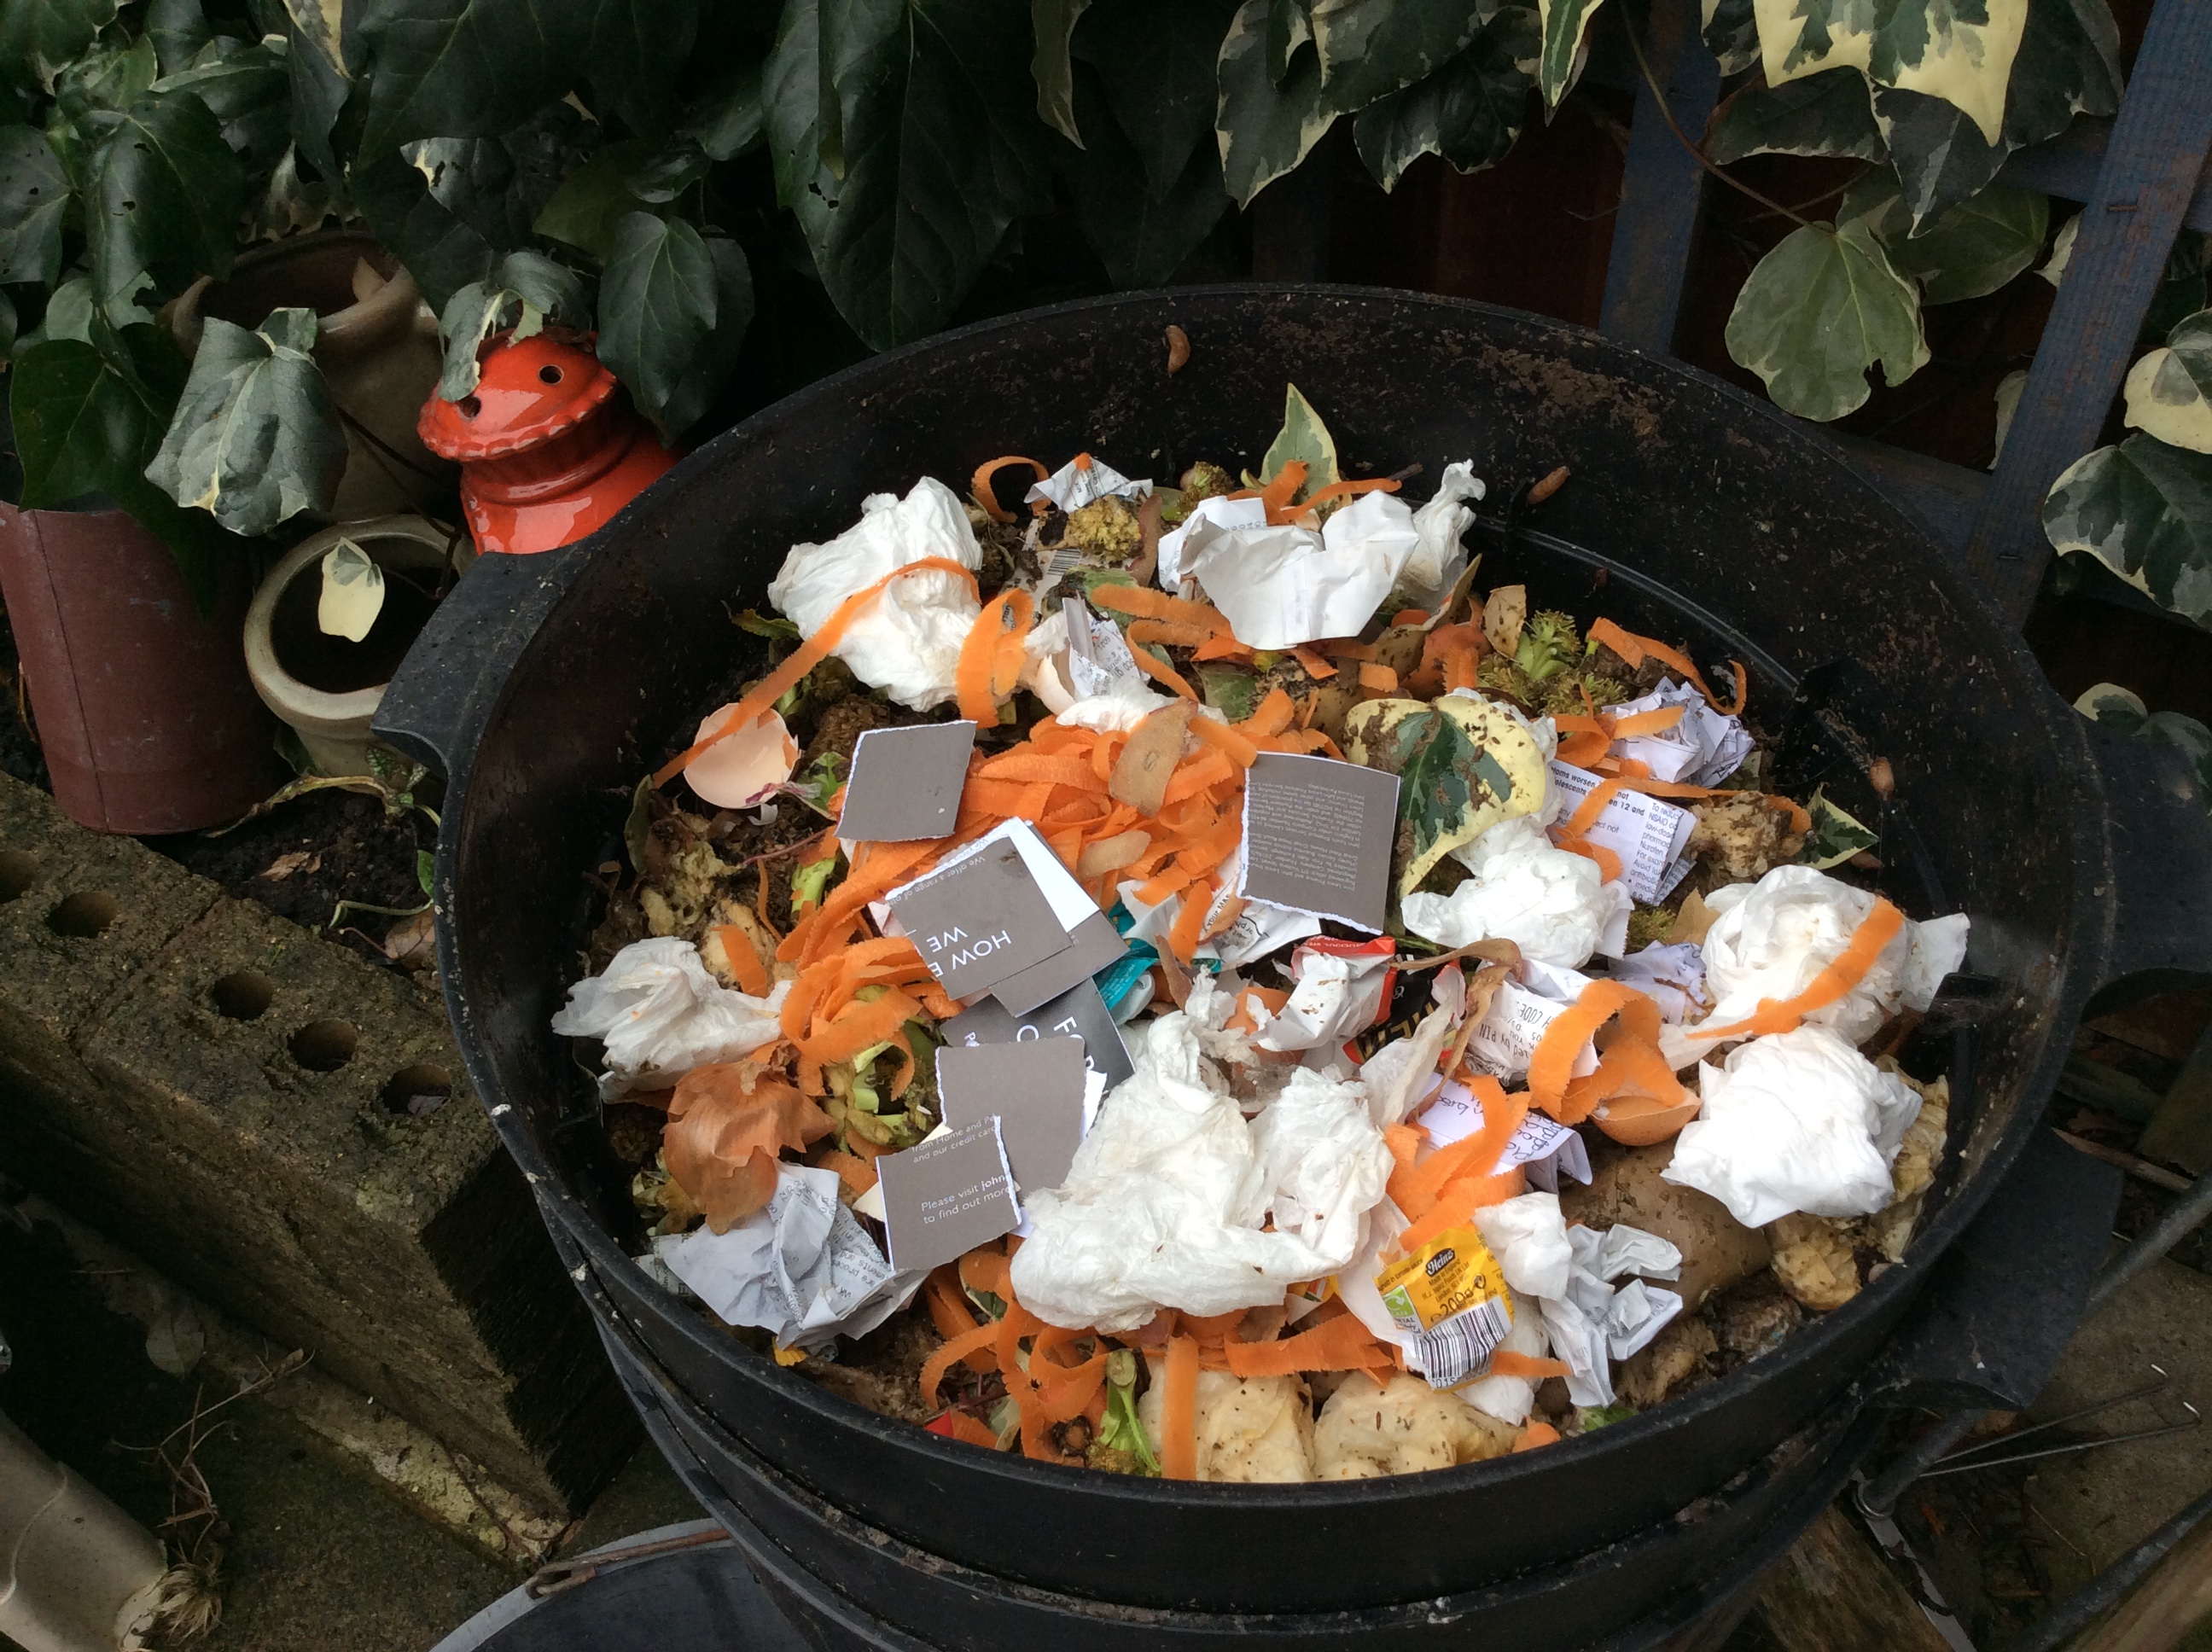
“I put about two inches of compost from my compost bin in the garden which contained a number of brandling worms into the first removable tray and then put some kitchen peelings and paper in the next removable tray which fitted on top of the compost one to start me off.
“Now it is well established, and I am reaping the benefits with enough liquid fertiliser for my garden and some very useful compost.
“Nevertheless, I have learnt by trial and error, finding that keeping the tap open to the liquid chamber at the bottom and placing a bucket underneath stops this flooding and drowning any worms in there. The pipe from the tap does need to be checked regularly as it does sometimes get blocked.
“Unlike a compost heap or bin where the worms can go where they are happiest, a wormery is quite a small space so the environment must be right. I find that a 50/50 mix of ‘greens and browns’, with sometimes more browns in the ratio if it is particularly wet weather, works for me. I use any kitchen peelings except onions and citrus for my ‘greens’ and shredded paper and cardboard for my ‘browns’. I also use egg shells, loose tea and a minimal amount of used coffee grounds. I feed infrequently, no more than once a week and it is quite happy even if I go on holiday for a fortnight – there’s no need for a wormery sitter. All will however depend on how many worms you have in there and the time of year, they are prolific breeders and more active in the summer but if it smells mouldy you are probably over feeding it.
“My wormery stays outside all year round, covered with a piece of carpet in very wet or cold weather which is raised by a large plant pot crock to ensure that oxygen can still enter. You can wrap it in bubble wrap or garden fleece to insulate it in the colder months, or even put in a garage or shed during times of really severe weather. Using straw inside will also keep your worms snug.
“The compost produced is very fine but also very high in nitrogen and will need mixing with soil or home-made compost before using in your garden, especially around flowering shrubs which will produce more leaves than flowers if an over strong mix is applied. I found this out to my cost when I mulched my peony with it neat last year!
“Liquid fertiliser which is produced by the wormery will need diluting on a 1-part fertiliser to 10-parts water basis before being used, but if you are also collecting rainwater in your bucket under the tap, adjust this accordingly. A quick tip, it should look like very weak lager.”
This is an article from the Composting Chronicle, a biannual newsletter containing a wealth of tips and information to help you compost successfully each season. The newsletter is a benefit of free membership to the Rot-a-lot club. For more information on membership, click here.


